Friday, July 23, 2010

Monogrammed Water Bottles

So I know my posts have been sporadic, but I wanted to show a project I completed a few weeks ago for gifts for the Softball Team coaches. Of course I got the idea from my favorite blogger, Amanda at Imperfectly Beautiful, but they were so cute, I couldn't resist....


Aren't they great...I purchased the bottles at the Dollar Tree for, you guessed it, a dollar!! And I used my Cricut to cut out the monogram and polka dots...Now, I would have loved to use some precious colored vinyl to complement the bottles a little better, but I got ripped off by a woman on Ebay!!! So she totally ruined my vision, but they turned out cute just the same. I will be ordering more vinyl in a variety of colors again soon, but I have to get over the fact that now I have to deal with thieves on Ebay, and if you are reading this lady, PPFFFFFTTTTT!!!!!!....anyway, have a great day and happy blogging!!!

Thursday, July 1, 2010

Happy 4th of July Weekend!!!

I know I've been MIA for a while...I've been trying to focus on my family and spend some quality time with the girls before Summer ends; we've also been on some fabulous much needed vacations so time has truly slipped by before my eyes...I have been doing quite a few crafts, not as many as I'd like, but enough to keep me from jonesing for my next craft fix....
For those of you who don't get the Family Fun Magazine or utilize their website, they have some very cute ideas for 4th of July crafts. Here is the modified 4th of July craft that the girls and I did today...
.

they loved it and rather than doing it on t-shirts that I knew they would never wear again, we purchased some canvas boards at Walmart..3 for $5. It was perfect and now I can display them every year. Simple hand print crafts and they turned out adorable (even though Butterbean insisted on doing a very unpatriotic pink background, much to my dismay). It has come to my attention per my smarty pants friend Denise, that my girls pictures look like handprint turkeys...just in case everyone else thought the same thing, they are NOT handprint turkeys, they are American Eagles in celebration of the 4th of July.

I hope everyone has a safe and blessed weekend and remember to keep praying for our beloved Gulf Coast. As of today there are waves of oil hitting our beaches and our marine life is dying. We could use everyone's prayers. Have a great weekend and keep on crafting....

Thursday, June 3, 2010

I'm still standing!!

I know I've been missing for the past few weeks...school is now out and Summer is in full swing, so I have alot less time for the computer and crafting. However, I have been working on some really fun projects and wanted to share them with you....
First off... have I told you all how much I adore my Cricut...I truly think it is the most fabulous addition to the crafting world EVER!!!
I have a friend who told me we need to start a "Cricut & cocktails" night....how much fun does that sound??? Well, I guess it sounds like fun to me...others may just enjoy the cocktails part, but I know it would be great to see what a bunch of tipsy ladies could create. Anyway, that may be something I look into at a later date but for now I'll just let everyone think I'm a super duper crafting momma with incredible talent...shhhh...nobody tell!!!
So, I've been making the window decals for cars lately..I had some extra vinyl and wanted to use it up..I hate to waste things, especially vinyl, as I practically have to sell my body to pay for the stuff...but here a few I made for my friend Denise.


If you didn't figure it out...she has a gymnast and swimmer in her family....I did do one for myself...with the stick figures and it is sitting very proudly on the back window of my Suburban...however, it is so crooked, I'm embarrassed to post it...
In addition to the stickers, I've been working on tshirts...and I have to tell you..I love, love them. Another friend of mine has been ordering these transfers from a lady. I was going to have her order me a few, but I just knew that I could make them myself. I decided that I would look around the internet and see if I could find a tutorial or instructions of a way to do it. Well, it wasn't an easy process, but I found two different ways of doing it...there apparently is the freezer paper method...you cut out a template with your Cricut and freezer paper...iron it on a tshirt and start painting in...or you can Photoshop a tshirt transfer on iron-on transfer paper...I will say that the Photoshop method is super simple and it will be the way I go from here on out...but I did try the freezer paper method as well..here are the results:

Photshop Method:


Here is the stenciled freezer paper method:


So what do you think? Which method do you like? I am going to make more of the Photoshop version for my girls (I can't take away my friends business..but Amy..if you're reading this, I'll be happy to be your supplier now..hint, hint)...and if you decide that you would like some great clip art to use on your own tshirts...check out mygrafico for some really great images...also....if you use a transfer paper from Walmart...ummm...they forget to tell you to use a piece of wax paper on top of your decal...in addition to a cotton press fabric....please don't forget this step, you will waste your printer ink and transfer paper like some other goofball (which will remain nameless) did!!! And on a side note...I have yet to launder either one of these...I'll update you all when I do...that may be the kicker of which is the most user friendly. OK, DO NOT WASTE YOUR TIME WITH THE TRANSFERS FROM WALMART OR MICHAELS...THEY WASH UP TERRIBLY AND ARE A WASTE OF TIME AND MONEY. I HAVE PURCHASED SOME NEW SOFTER TRANSFERS FROM DHARMA TRADING AND PRESSED THEM YESTERDAY. I WILL BE LAUNDERING AND LET YOU KNOW THE RESULTS OF THESE. I HATE WHEN SOMETHING I LOVE SO MUCH TURNS OUT TO BE A DISASTER BECAUSE OF SUBPAR MATERIAL. So I finally found some transfers that don't fade or tear after washing...they can be purchased at Dharma Trading and are a soft transfer. I have washed my girls shirts a few times and they are fine, I'll check in soon...please leave your feedback on the tshirts...

Wednesday, May 12, 2010

I got my swim trunks and my FLIPPIE FLOPPIES!!!

She's done it again...Amanda at Imperfectly Beautiful has come up with a fabulous way to jazz up plain old flip flops into spectacular works of art (loosely speaking). So be sure to go to Amanda's blog and check out the tutorial on how to make these gorgeous rosettes. Then go back and see her tutorial on how to make her version of the flip flops...you can use her tutorial which is fabulous...or you can take make version and run with it...I made the rosettes using her tutorial...this was my first attempt at making these gorgeous gems, and I may have gotten them a little too tight...but they worked for what I was trying to achieve. So then, I decided I would modify her idea a bit. I have two girls, so when I see something that I can utilize in their wardrobe...I always try to figure out a way to use it to my advantage. What I decided to do, was make them interchangeable (I wish Blogger had sound effects...I would definitely have added a lightening bolt sound at this sentence).
I glued felt to the back of my rosettes (which you will notice I didn't do in my picture...I figured out later that I would have to or when they pulled it off the rosette would get tugged on and possibly fall apart...the green one has it's own piece of felt on the back). Then I hot glued velcro dots to the back of them....I then cut an identical piece of felt and added the opposite side of the velcro to the plain piece of felt...(to make this easier..I attached the velcro to itself than added glue and placed the plain piece of felt on top...that way it all lined up).


I then had a rosette with velcro and a plain piece with velcro that can be easily slipped under the shoe and changed out with different color rosettes as needed....


Both my girls wore a pair to school today...


these are perfect for summer and I can't wait to start making rosettes in every color....did I mention I love Amanda at Imperfectly Beautiful...I think I'm going to start a fan club for this woman...she is a genius...

Friday, May 7, 2010

Mother's Day Silhouette's with Cricut

ATTENTION: IF YOU ARE MY MOTHER...DO NOT READ ANY FURTHER!!!
Hello blogger buddies...I've been working really hard on Mother's Day gifts and honestly I just about gave up and bought them all a bunch of color your own pillowcases...(there was a sale at Michael's)....I have been so frustrated that I just about lost my ever-lovin' mind!! So...I don't know if you want to try it, or if you want to go the traditional route...which I feel certain would be so much simpler, but here are the instructions on how to make a silhouette with your Cricut...You will need SCAL, Inkscape (free program), and Photoshop Elements (there is a 30 day free trial for this program) for this project.
First off...I took some mugshots of my doodles...I stood them up against a light background, which believe it or not was very difficult to find in my house, as all the walls are painted in colors. Now...go to Positively Splendid for the tutorial on how to black out the silhouettes with Photo Express...She gives a fantastic tutorial on how to use PE and make these silhouettes...

Once you have finished these, use your Inkscape to convert them into a .SVG file...open Inkscape...import your photo which you saved from PE, make sure you scale it into the rectangular box....open Path...choose Trace Bitmap....then hit ok when the Bitmap box pops up....right click you image and drag the new image to the side...then click on original image and delete it....when you have deleted the original image...drag you new image and back into the rectangle...save to desktop...
Now, there is a tutorial out there that shows you pictures and step by step photos of how to use Inkscape..however, I didn't have them bookmarked...but I feel pretty certain I got it from YouTube.

You are now ready to open SCAL and import the new .svg file....once imported, scale it to the size you need. I used vinyl in my Cricut, but you could use cardstock or whatever you want to make your silhouettes. Hit cut on your SCAL....That's it...yeah right...easier said than done...but I explained it the best I could....
It truly was not an easy project, but now that I have the hang of the PE...I think I will be able to do it a little easier next time...Again, there are plenty of videos on the internet showing you step by step photos of how to use SCAL.

Now, I found some great frames at Dollar Tree...


this was my first visit to this store...who knew they had such great bargains? I assure you ...it won't be the last time I visit...The frames had a decent design but really needed a good coat of spray paint. I took the backs off, well, honestly, they were falling off the back already...the glue was coming undone, I don't know what I expected for $1....but anyway, I removed them and gave them a good coat of Krylon.


Once they were dry, I glued the backs on with E-6000 and put them all back together...


I cut out a piece of cardstock to fit inside the frames and placed the vinyl cutout in the center.


I think they turned out great...and hopefully all the "Mom's" will love them. If effort counts, I should get some big daughter points..


I know the tutorial is relatively useless, but I wanted to get this up before Mother's Day in case any of you wanted to try it...if you have questions or you don't understand my ramblings, I will do my best to help walk you through it...just comment. I have seen this done with tracing paper and black constuction paper...that seems simple enough, but I LOVE MY CRICUT and I'm always looking for new ways to utilize it...I hope all the Mom's out there have a wonderful and blessed Mother's Day. I know my favorite gift are the children that have come into my life and changed me for the better. Happy Mother's Day!!!

Thursday, May 6, 2010

Teacher's Gifts...Super easy!!!

Well, I had no choice but to pick myself up the oily floor and dust myself off.It was time to get back to crafting...School is about to end and I have to get teacher's gifts finished. So I scoured the bloggerworld and found a beautiful idea for a gift...please check out and follow Amanda at Imperfectly Beautiful. She is phenomenal and has such unique and creative ideas...She always adds a tutorial and has some of the best ideas for using a Cricut. I have followed her for a while and she has never let me down...be sure to look around on her blog and check out all her tutorials.
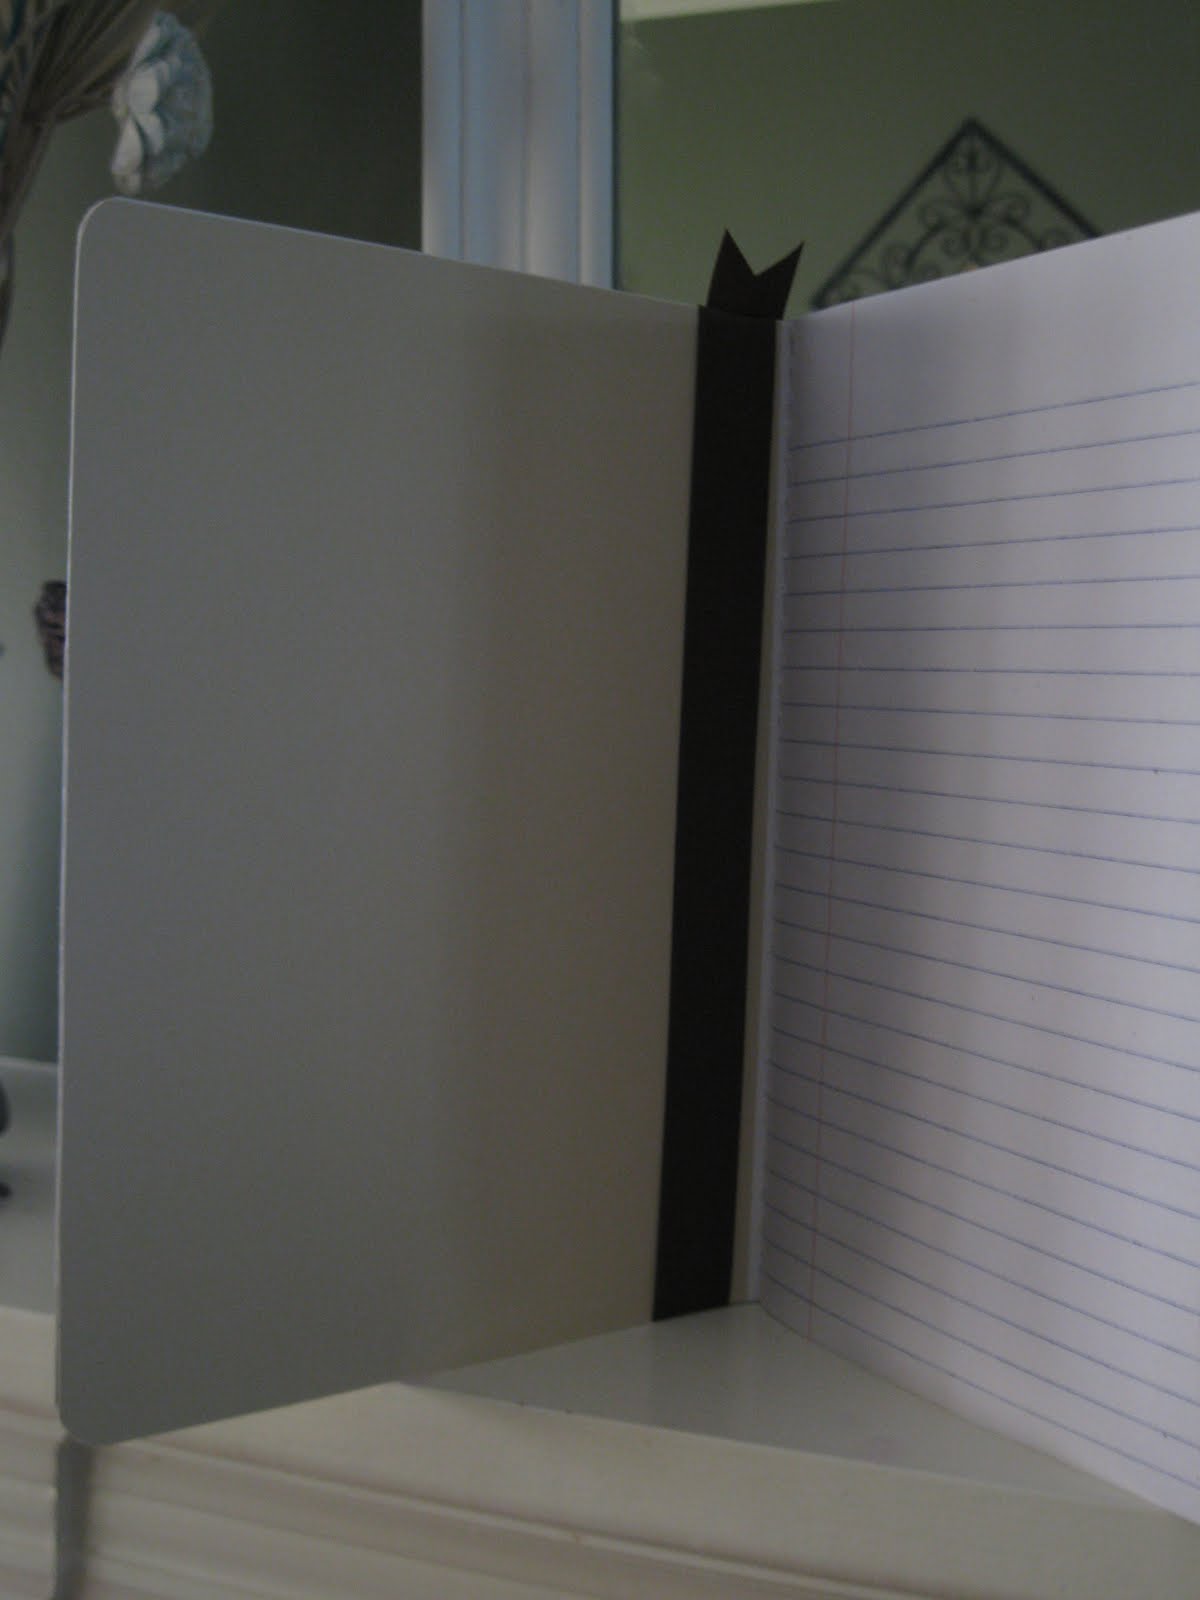
So here are my completed teacher gifts...Here are the supplies you will need: First and foremost, click on the link above (for the tutorial); a composition book (.94 at Walmart)


and some decorative paper and/or card stock, and ribbon, . Now, I used Zig two -way glue on mine..only because I didn't have any double stick tape...but I'm sure either would be fine...plus, I'm really bad at lining up my paper, so I needed something I could reposition. Anyway, I really think they turned out great and I hope the teachers enjoy them. My friend Denise is a teacher and she has always said that as much as she appreciates all the gifts that her students bring her for different holidays and end of year...there are only so many places to put decorative candles and only so many body parts she can wash with bath products...however, nobody will ever say that she smells bad!!!!


On a side note: you will notice on Amanda's blog that she has a tutorial on how to make a decorative clipboard. Well, I tried it and it was a nightmare...um...when she tells you to use spray adhesive, USE IT!!! Don't try to use something else...I used it for the initial paper on the bottom, but when I had to reposition the paper it sorta got rippled. So I thought, I'm just gonna use a two-way glue for the top piece...it seemed to be ok, until I Modge Podged...then it bubbled up everywhere!! Oh well, I will definitely try it again, but next time I'm gonna follow the directions to a T...sorry Amanda for screwing it up, you are the Master...I'm your humble servant!! Happy blogging!!!

Friday, April 30, 2010

Oil Spill Disaster


Hey everyone...I haven't been very crafty the last few days as we have had so much going on....my creative juices are clogged with thoughts of oil oozing into our beautiful Gulf Coast...It has taken a toll on my desire to do anything but worry...Don't you hate when things you have no control over consume your every thought. I fear that after everything this area has been through the past few years we are about to feel the effects of Mother Nature like never before. Katrina packed a wallup but this is going to be just as devastating if not worse...our economy is suffering as it is..but we somehow managed to start rebuilding and rehabilitating what the Hurricane destroyed. Now life as we know it will come to abrupt halt...the lively hood that sustains many people from this area has already been closed. There will be no more commercial or recreational fishing in the areas affected by the oil leak. The restaurant owners will have to resort to purchasing from outside vendors for the food that they provide to our visitors and people who live on this gorgeous part of the country. They will have to incur more costs which will in turn be handed out to the locals to pay for, which will inevitably resort in the closing of some of the local restaurants. Our helpless wildlife is being affected and we have already seen deaths of sea turtles and birds on our shores and the oil hasn't even made it here..


So, I am at a loss of creativity. I am sad and grieving for my city and state. We have been through such tragedy and have scraped and clawed our way back to some sort of normalcy, a new normal, but things were getting better. Now I feel we are being hit below the belt. We are living through a disaster of epic proportion and I hope and pray that we won't be forgotten. That we don't become a sacrifice for big business. I ask the few of you who follow me, when you say your prayers please consider offering up a special one for the Gulf Coast. Please ask for guidance and vision for the higher ups who are addressing the oil leak. Please pray that they will find a way to preserve the beaches, the wildlife, the way of life for the people of this area. I will try and update everyone on what is happening and I can tell you that as of this afternoon there is no sign of oil on the shores, however, the smell is pungent and of course I've already mentioned the wildlife. Please keep us close in your thoughts and if you can volunteer or help in any way...please contact these numbers...MS Contacts for Oil Spill Response Information To discuss spill-related damage claims, please call (800) 440-0858. To report oiled or injured wildlife, please call (866) 557-1401. To report stranded dolphins or sea turtles, please call (888) 767-3657. To report stranded marine mammals, please call (888) 806-1674. To report oil on land, or for general community and volunteer information, please call (866) 448-5816.
Thank you to everyone and I will update everyone soon.

Monday, April 19, 2010

To Bird's Nest or not to Bird's Nest...that is the question??

Here we go with a new season and time for a new mantel. I have been inspired so much since I started blogging to try and bring out the creativity in myself. I think sometimes women get so busy with doing daily chores and mundane tasks, they forget how to use their minds and body in ways that reflect how creative they are. I truly think God has given us all talents, we just have to take the time to figure out what they are....so anyway, I'm really trying to utilize my ability or so-called talent of being a copycat. That's right..I admit it, I AM A COPYCAT!! So if you are worried about someone using your ideas, you better block me as a follower, because I'm out there and ready to steal all the ideas. Seriously, when I see something that moves me into action, I do try to give it my own spin. But sometimes it's just difficult to improve on perfection. So while stumbling around bloggerland, I came across some beautiful mantels that were decorated in all white. I loved the look and how clean and crisp it seemed. So, I searched around the house and of course had a few white things but definitely not enough to fill the mantel. So off to the local thrift store and guess what I found...REALLY UGLY VASES AND PITCHERS.

YIKES!!! I know, but I only paid $6.00 for all of them....then sprayed them with white primer and then white spray paint....now look at them...

You'll notice that the little brown teapot that I picked up for a dollar isn't in the picture...when I was getting ready to paint it, I noticed the "Made in Occupied Japan" mark and thought, I just can't spray paint this. It probably isn't worth much, but the idea made me shudder...so I will use it somewhere else. I also want you all to know that if I ever had a job as a professional spray painter, I would be standing on the street corner for additional funds...I'm terrible!!! There are streaks and puddles all over these things, but hopefully I can hide them where nobody will notice.
So here is the finished product...


I made this plate with my cricut...it's just a dinner plate I had in the pantry and black vinyl design


Here is the debated bird's nest...she's crazy...it's precious!!


I've had these little iron bugs for quite awhile, I thought they looked sweet on the mantel to tie in the darker pieces.


I really like it; it isn't exactly what I had pictured, but I like all the same.I swapped out my mirror that I normally use above the fireplace with this white one I had in the garage. I added the little brown Occupied Japan teapot in and sprayed another little vase with ORB...it looks horrible up close, but unless someone is standing inspecting the mantel, they shouldn't be able to tell what a screw up it is...Then there is the bird's nest debate; my sister hates the bird's nest on the bud vase, she tells me when she comes over she will "flick it off"...what do you think? Bird's nest or no bird's nest?...I think it adds a little sumpin' sumpin'....plus I saw it on someone else's blog and thought it was adorable.
I look forward to everybody's input...good or bad I would love to hear it. Trust me, nothing anyone can say will compare to my sister and her bird's nest aversion, I say she's cuckoo, cuckoo!!!


Photobucket