ATTENTION: IF YOU ARE MY MOTHER...DO NOT READ ANY FURTHER!!!
Hello blogger buddies...I've been working really hard on Mother's Day gifts and honestly I just about gave up and bought them all a bunch of color your own pillowcases...(there was a sale at Michael's)....I have been so frustrated that I just about lost my ever-lovin' mind!! So...I don't know if you want to try it, or if you want to go the traditional route...which I feel certain would be so much simpler, but here are the instructions on how to make a silhouette with your Cricut...You will need
SCAL,
Inkscape (free program), and
Photoshop Elements (there is a 30 day free trial for this program) for this project.
First off...I took some mugshots of my doodles...I stood them up against a light background, which believe it or not was very difficult to find in my house, as all the walls are painted in colors. Now...go to
Positively Splendid for the tutorial on how to black out the silhouettes with Photo Express...She gives a fantastic tutorial on how to use PE and make these silhouettes...
Once you have finished these, use your Inkscape to convert them into a .SVG file...open Inkscape...import your photo which you saved from PE, make sure you scale it into the rectangular box....open Path...choose Trace Bitmap....then hit ok when the Bitmap box pops up....right click you image and drag the new image to the side...then click on original image and delete it....when you have deleted the original image...drag you new image and back into the rectangle...save to desktop...
Now, there is a tutorial out there that shows you pictures and step by step photos of how to use Inkscape..however, I didn't have them bookmarked...but I feel pretty certain I got it from
YouTube.
You are now ready to open SCAL and import the new .svg file....once imported, scale it to the size you need. I used vinyl in my Cricut, but you could use cardstock or whatever you want to make your silhouettes. Hit cut on your SCAL....That's it...yeah right...easier said than done...but I explained it the best I could....
It truly was not an easy project, but now that I have the hang of the PE...I think I will be able to do it a little easier next time...Again, there are plenty of videos on the internet showing you step by step photos of how to use SCAL.
Now, I found some great frames at Dollar Tree...

this was my first visit to this store...who knew they had such great bargains? I assure you ...it won't be the last time I visit...The frames had a decent design but really needed a good coat of spray paint. I took the backs off, well, honestly, they were falling off the back already...the glue was coming undone, I don't know what I expected for $1....but anyway, I removed them and gave them a good coat of Krylon.

Once they were dry, I glued the backs on with E-6000 and put them all back together...

I cut out a piece of cardstock to fit inside the frames and placed the vinyl cutout in the center.

I think they turned out great...and hopefully all the "Mom's" will love them. If effort counts, I should get some big daughter points..


I know the tutorial is relatively useless, but I wanted to get this up before Mother's Day in case any of you wanted to try it...if you have questions or you don't understand my ramblings, I will do my best to help walk you through it...just comment. I have seen this done with tracing paper and black constuction paper...that seems simple enough, but I LOVE MY CRICUT and I'm always looking for new ways to utilize it...I hope all the Mom's out there have a wonderful and blessed Mother's Day. I know my favorite gift are the children that have come into my life and changed me for the better. Happy Mother's Day!!!
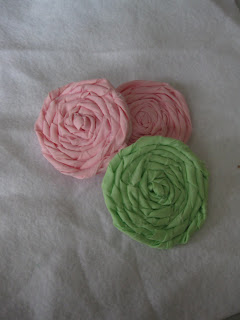 but they worked for what I was trying to achieve. So then, I decided I would modify her idea a bit. I have two girls, so when I see something that I can utilize in their wardrobe...I always try to figure out a way to use it to my advantage. What I decided to do, was make them interchangeable (I wish Blogger had sound effects...I would definitely have added a lightening bolt sound at this sentence).


